
Affiliate disclosure As an Amazon Associate we earn from qualifying purchases, at no extra cost to you.
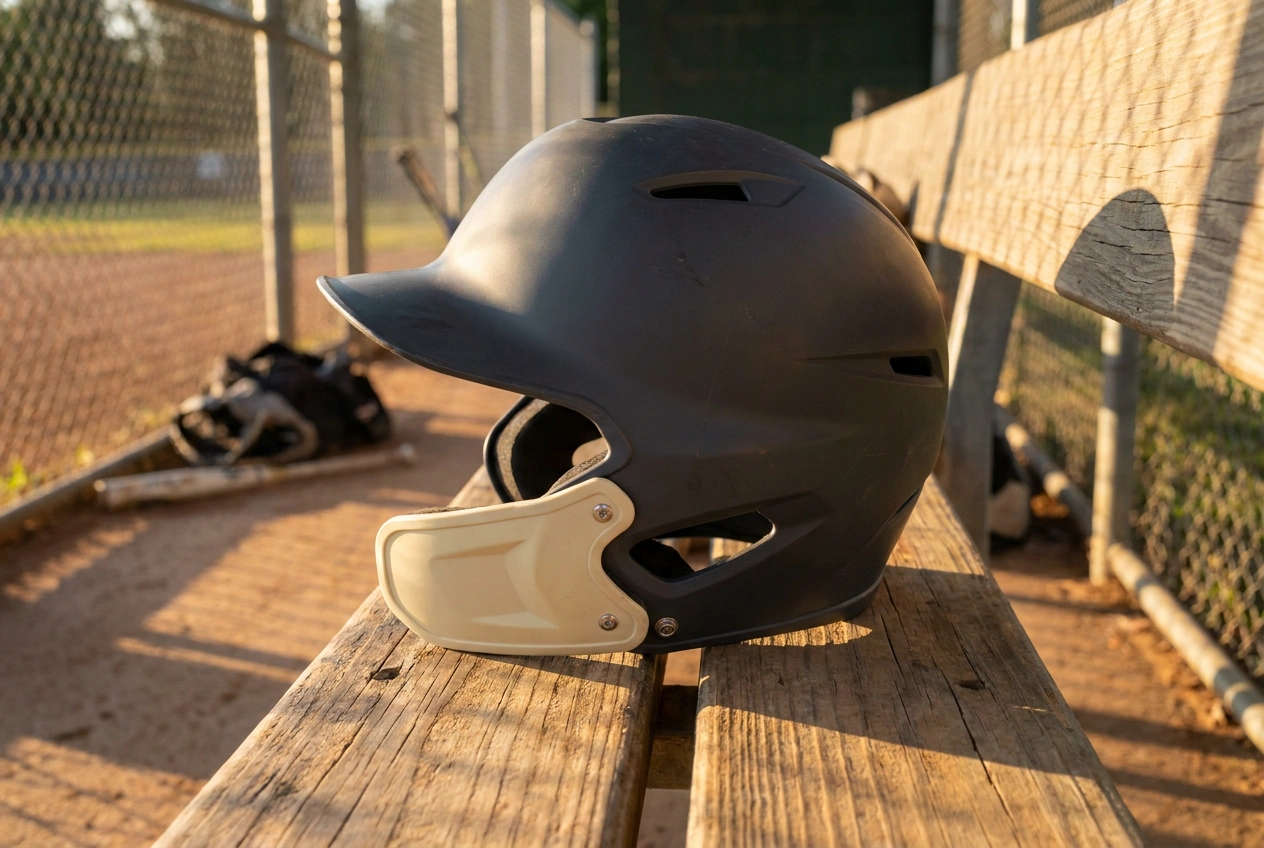
A C-flap (jaw guard) is a curved plastic shield that clips to the ear-flap side of a batting helmet to protect the cheek and jaw from errant pitches. Key rule: mount it on the side facing the pitcher. Right-handed batters mount on the left; left-handed batters mount on the right.
Pitch speeds at the youth level regularly top 60 mph, and at high school they push 80 mph or faster. The standard batting helmet covers the skull and one ear, but it leaves the lower face exposed. A C-flap closes that gap. Originally popularized by MLB players returning from facial fractures, jaw guards are now common from Little League through college ball and are required by some travel-ball organizations for younger age groups.
Installing one is a 15-20 minute job with basic tools. This guide walks through the left vs. right decision, everything you will need, and a step-by-step process that avoids the common mistake of drilling the wrong side.
What Is a C-Flap and Why Use One
A C-flap gets its name from its curved shape: a rigid outer shell (usually high-impact Lexan or ABS plastic) with a foam-padded inner surface. It mounts directly onto the existing ear-flap rivet holes of a batting helmet, extending downward to shield the cheekbone and jaw. Unlike a full-cage face guard, it preserves peripheral vision and does not interfere with tracking pitches.
The main reasons players add one:
- Facial fracture prevention - the jaw and cheekbone are unprotected by a standard helmet shell and are common injury points on inside pitches or hit-by-pitch (HBP) events.
- Confidence at the plate - players who have been hit by a pitch often develop a flinch; a jaw guard removes the fear of facial injury.
- League requirements - USA Baseball, some travel-ball circuits, and several high school state associations now mandate C-flaps for younger age groups.
- Long service life - one guard typically outlasts multiple helmet replacements if no impact occurs.
Left vs. Right: Which Side to Mount
This is the single most important decision, and it confuses a lot of players because the label on the package refers to the batter's handedness, not which physical side of the helmet you mount on.
The rule: the C-flap goes on the side of the helmet that faces the pitcher while you stand in the box.
- Right-handed batter (stands in the left-hand batter's box, left side faces the pitcher) - mount the C-flap on the left side of the helmet. Buy a guard labeled for right-handed batters (RHB).
- Left-handed batter (stands in the right-hand batter's box, right side faces the pitcher) - mount the C-flap on the right side of the helmet. Buy a guard labeled for left-handed batters (LHB).
Some newer guards (like certain Easton and 3N2 models) are ambidextrous and can be flipped to either side. Check the packaging before purchasing if flexibility matters.
Softball batters follow the same rule: the flap goes on the side facing the pitcher, regardless of whether it is fastpitch or slowpitch.
Tools and Hardware You Need
Most C-flaps ship with mounting hardware (two screws and a Phillips screwdriver is usually all you need). A few guards require you to drill new holes, which takes about five more minutes. Here is what to gather before you start:
- C-flap / jaw guard - matched to your batter's handedness (see section above)
- Phillips-head screwdriver - for the mounting screws; always included in the package
- Electric drill + 7/32-inch drill bit - only needed if your helmet does not have pre-drilled holes or if the guard holes do not align with existing rivets
- Needle-nose pliers - to remove the decorative plastic rivet caps that cover the existing ear-flap holes
- Masking tape - optional but useful for marking hole positions before drilling
- Double-sided foam tape - some installs use a strip to re-secure the interior foam pad after removal
Step-by-Step Installation
Follow these steps in order. The whole process takes 15-20 minutes on the first install; subsequent installs take about 5 minutes.
Step 1 - Confirm the correct side
Before touching the helmet: hold it in your hands and simulate your batting stance in your head. Identify which ear-flap is on the pitcher's side. That is where the C-flap goes. Double-check the guard packaging says the right handedness.
Step 2 - Remove the interior ear pad
Reach inside the helmet and peel out the foam ear pad on the side where you are installing the guard. Most pads are held by hook-and-loop (Velcro) fasteners and pull off cleanly. Set it aside.
Step 3 - Remove the rivet caps
Use needle-nose pliers to pop out the small decorative plastic rivet or plug that sits in the existing mounting hole on the outside of the ear flap. Most helmets have one or two of these. Work gently to avoid cracking the shell - a slow rocking motion breaks the friction hold.
Step 4 - Position the C-flap and mark holes
Hold the C-flap against the outside of the ear flap in the intended position. The top of the guard should sit flush with the existing hole(s); the curved body should sweep downward and slightly forward to cover the jaw. Use masking tape or a marker to note the hole positions if your guard requires additional drilling.
Step 5 - Drill if needed
If the guard has hole positions that do not line up with the existing helmet holes, drill new holes using a 7/32-inch bit. Work slowly and apply gentle pressure - batting helmet shells are thin and can crack if you force the drill. Drill from the outside in.
Step 6 - Thread and tighten the screws
Insert the mounting screws from the outside through the guard holes and the helmet shell. Reach inside the helmet to hold the nut (if a nut is included) and tighten from the outside with the Phillips screwdriver. Do not over-torque - snug is enough. Over-tightening can crack the shell or strip the screw hole.
Step 7 - Snap on the TPU cover
Most guards include a plastic cover that snaps over the exposed hardware on the outside of the helmet for a clean look. Press it firmly until it clicks.
Step 8 - Re-attach the interior ear pad
Press the foam ear pad back into place over the now-mounted screw from the inside. Some pads fit flush over the hardware; others need a strip of double-sided foam tape to stay flat if the screw head creates a bump. Trim the tape if needed so it does not create pressure points.
- Correct side confirmed before any drilling
- Interior ear pad removed before drilling
- Rivet caps removed cleanly with pliers
- Guard positioned and holes marked or aligned
- New holes drilled (if required) at 7/32 inch
- Screws tightened snug, not over-torqued
- TPU hardware cover snapped on
- Interior ear pad re-attached flat and flush
Fit and Clearance Check
Before stepping on the field, run through this quick check:
- No rattle - grip the guard and try to shake it. It should have zero play. Any rattle means the screws need another quarter-turn.
- Vision clearance - put the helmet on and take a practice batting stance. You should be able to see the imaginary pitcher and the strike zone with no obstruction. The top of the guard should not cut into your field of view.
- Jaw clearance - open and close your mouth normally. The bottom edge of the guard should not press into your jaw or chin. Most guards sit 1-2 cm clear of the jaw at rest.
- Ear pad comfort - the re-attached pad should sit flat. If you feel a hard lump from the screw head, add an extra layer of foam tape or a thin adhesive pad between the hardware and the foam.
- Helmet fit unchanged - the helmet should still sit level and snug after the install. The added weight of a C-flap (typically 60-100 grams) is minor, but check that it does not tilt the helmet to one side on your head.
League Requirements and NOCSAE Rules
Standards and requirements vary by governing body. Here is a quick reference for 2026:
NOCSAE (National Operating Committee on Standards for Athletic Equipment)
NOCSAE sets the baseline standard for batting helmets in the US. As of 2026, NOCSAE does not publish a separate certification standard for C-flaps/jaw guards - the guard is treated as an add-on accessory rather than a standalone piece of equipment. The underlying helmet must still carry a current NOCSAE certification stamp.
USA Baseball and Little League
USA Baseball rules require batting helmets to meet NOCSAE standards. Little League International mandates NOCSAE-approved helmets but does not require jaw guards for all age groups. Check your local or state affiliate rules, as many districts have added jaw guard requirements for younger age groups (8U through 12U in some programs).
High School (NFHS)
The National Federation of State High School Associations (NFHS) requires NOCSAE-approved batting helmets. Some state high school associations have added requirements for face/jaw protection at the varsity level. Check your state's specific rulebook before the season.
Travel ball and independent tournaments
Many travel-ball organizations (Perfect Game, USSSA, AABC) have their own equipment rules, and C-flap requirements differ by age bracket and tournament. When in doubt, contact the tournament director before buying a guard.
Softball
USA Softball (formerly ASA) follows NOCSAE standards for helmets. Jaw guard requirements for fastpitch vary by age division. Many coaches recommend them for all age groups given the pitch speeds involved.
One practical note: if your league does not require a jaw guard, wearing one is still legal. Referees and umpires cannot require you to remove a C-flap that is securely attached and does not obstruct your helmet's certification markings.
DOT vs ECE vs Snell vs MIPS, how to pick the right lid in 60 seconds, and when to replace it. One page, no fluff.
Frequently Asked Questions
Do I need to drill to install a C-flap?
It depends on the helmet. Many modern batting helmets (Rawlings RCFH, MACH, Easton Z5, and similar) have pre-drilled mounting holes in the ear flap, so no drilling is needed - you just remove the plug and screw the guard on. Older or budget helmets may require a 7/32-inch hole. Check your guard's instruction sheet; it will specify whether drilling is required for your model.
Can I move a C-flap from one helmet to another?
Yes, as long as the hole spacing matches and the new helmet has an ear flap on the correct side. Remove the screws, pop off the TPU cover, pull the guard away, and repeat the install on the new helmet. If the new helmet needs different hole positions, you may need to drill. Some universal guards like the Markwort and Insider Bat models fit most standard helmet shells.
Will a C-flap fit any batting helmet?
Not every guard fits every helmet. Brand-specific guards (Rawlings MACH, Easton Z5 jaw guard) are designed for that brand's hole pattern. Universal guards use wider slot holes that accept a range of spacing. Always check the compatibility list on the product page before buying, or buy a guard labeled as universal.
Is a C-flap the same as a full face guard?
No. A C-flap covers only the lower cheek and jaw, leaving the eyes and nose open. A full cage or face guard adds a wire cage or visor that covers the full face. C-flaps are more common in baseball at the high school and adult levels because they preserve vision better; full face guards are more common in youth fastpitch softball and for players who want maximum protection.
How do I know which C-flap fits my specific helmet model?
Look for the brand and model name printed inside the helmet shell. Then cross-reference with the C-flap manufacturer's compatibility chart - Rawlings, Easton, Markwort, and 3N2 all publish these online. If you cannot find a match, a universal guard with slotted mounting holes is the safest choice. The Insider Bat and Markwort universal guards fit most standard OEM helmet ear-flap dimensions.
