
Affiliate disclosure As an Amazon Associate we earn from qualifying purchases, at no extra cost to you.
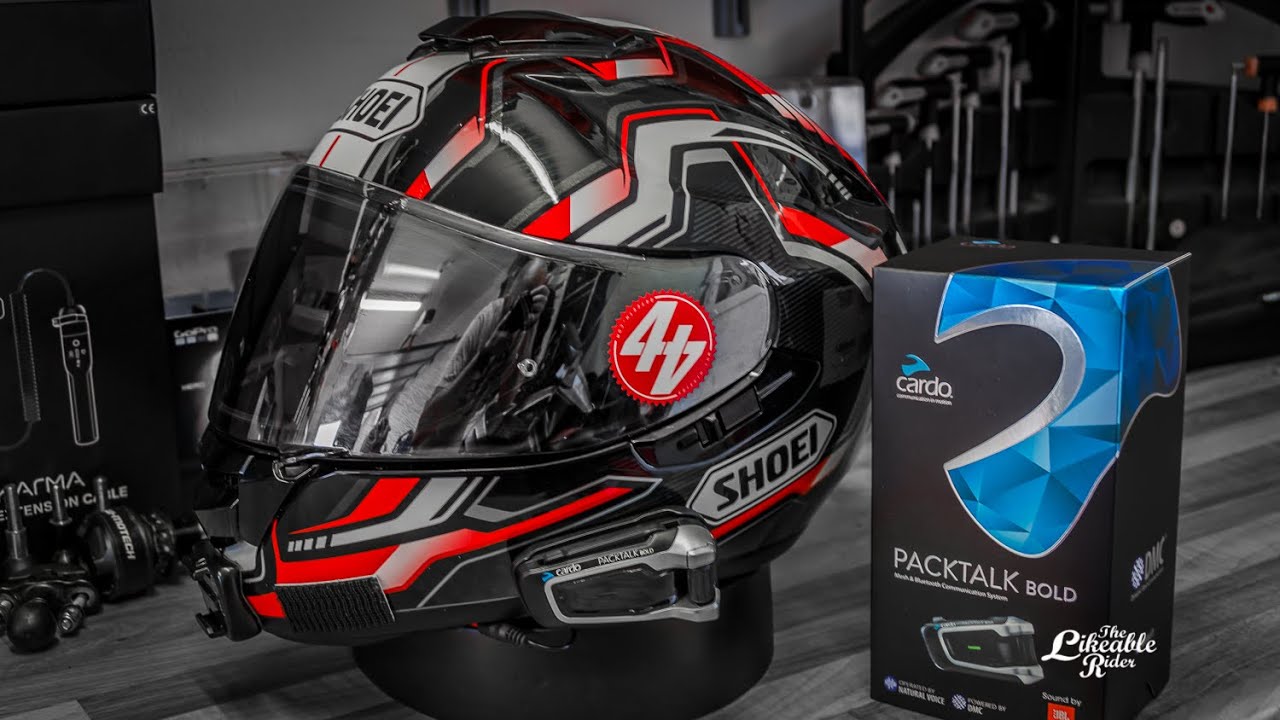
To install a Cardo intercom on your helmet: choose a clamp or adhesive mount bracket, attach it to the helmet shell, place the two speakers in the ear pockets (centered over each ear, spacers if needed), fit the microphone on the chin bar or boom arm, route and tuck the wiring, then click the unit onto the bracket. First charge and pair via the Cardo Connect app.
Cardo is the most popular motorcycle intercom brand on the market - and for good reason: once installed, an intercom changes how a ride feels entirely (see our piece on why riders use helmet intercoms on and off road if you are still weighing whether it is worth it). The Packtalk Bold, Packtalk Edge, and Spirit all follow the same basic installation logic, so once you understand the system you can fit any of them in under 30 minutes. The process involves three main jobs: mounting the bracket on the shell, seating the speakers in the ear pockets, and routing the microphone to where your mouth actually is.
Our research desk has cross-referenced Cardo's official installation guides, owner forum reports from ADVRider and r/motorcycles, and community feedback on common fit problems (particularly for riders with glasses and for helmets with shallow speaker pockets). Here is the full process, step by step.
Before You Start: What You Need
Pull out everything from the box before you touch the helmet. Cardo units ship with both a clamp mount and an adhesive mount, plus speaker spacers, a corded microphone (for full-face), a boom microphone (for open-face or modular), and adhesive pads. Lay them out and confirm you have:
- Clamp bracket and adhesive bracket (one of each; use the right one for your helmet per the comparison table below).
- Two speakers with pre-attached wiring.
- Speaker spacers: thin foam or rubber pads that lift the speaker closer to your ear if the pocket is too deep.
- Corded microphone (for full-face helmets with a chin bar).
- Boom microphone arm (for open-face, half-shell, or modular helmets).
- Cardo Connect app downloaded on your phone (required for initial pairing and firmware update).
Also check that your helmet has dedicated speaker pockets in the ear areas of the liner. Most helmets sold since 2018 do. If yours does not, you will need to create shallow recesses with scissors, or confirm the speakers sit flat enough without pockets.
Which Cardo Unit Should You Install on Your Helmet?
Match the unit to your helmet's speaker pocket depth first and to the feature list second. Every current Cardo installs the same way (bracket on the shell, speakers in the pockets, mic on the chin bar or boom arm), so the model you pick changes the sound and the features, not the fitting job below. Pocket depth is the one thing that actually goes wrong: a speaker that is too thick for a shallow pocket presses on your ear and turns a 45-minute ride into a headache, and no amount of app volume fixes it.
Measure the recess in your helmet's ear pocket before you buy. Cardo publishes the speaker thickness for each unit, so the match is checkable rather than a guess:
| Your helmet | Unit that fits | What Cardo specifies | Mic to use |
|---|---|---|---|
| Shallow ear pockets (common on sport shells and budget full-face helmets) | Cardo Spirit | Thin 32 mm speakers, the slimmest of the four units here | Corded (full-face) or boom (open-face) |
| Standard pockets, single or two-rider use, wants FM radio | Cardo Spirit HD | Thin 40 mm speakers, built-in FM with RDS | Corded or boom |
| Standard to deep pockets, rides in a group | Cardo Packtalk Neo | 40 mm JBL speakers, 2nd-gen Mesh for up to 15 riders | Corded or boom |
| Deep pockets, wants the loudest audio and crash detection | Cardo Packtalk Pro | 45 mm JBL speakers, magnetic Air Mount, crash detection | Corded or boom |
| Already owns a Freecom or Packtalk and finds the sound thin | Cardo 45 mm Audio Set | Speaker-only upgrade, works with most helmet communicators | Keeps your existing mic |
Two practical notes the spec sheets bury. First, the 45 mm speakers in the Packtalk Pro are the reason it sounds better than the Spirit, and also the reason it will not sit flat in a shallow pocket without carving the liner. Louder is not automatically better if it is pressing on your ear. Second, Mesh only matters if the people you ride with also run Mesh. If you ride alone or two-up on a Bluetooth pairing, you are paying for a network of one.
Running One Unit Across Two Helmets
If you own a summer helmet and a winter one, you do not need a second intercom. Cardo sells a second helmet kit: a spare bracket, speakers and microphones that stay permanently installed in helmet number two, so the unit itself unclips from one and clicks onto the other. It is the single most useful accessory in the range and almost nobody knows it exists.
The Packtalk Pro/Edge second helmet kit ships with both the boom and the wired microphone, and Cardo states it suits almost all helmets except half helmets. Spirit and Freecom X owners need the matching Freecom-X/Spirit kit instead, because the speaker connectors are not shared across those product lines.
Fitting the second kit is the same job as the first install, so work through the steps below once more on the other helmet. If the second helmet is an open-face or a lid you use on a sled, our guides to Bluetooth headsets for cruiser and open-face riders and snowmobile communication systems cover the mic and cold-weather differences that catch people out.
Still deciding which unit to buy before you fit anything? Our roundup of the best motorcycle Bluetooth intercoms sorts them by how many riders you actually ride with.
Step 1: Choose the Right Mount Type
This is the decision that determines everything else. Cardo gives you two ways to attach the unit to the helmet shell; get it right here and the rest is straightforward. (The full comparison is in the table below. Short version: try the clamp mount first on any ventilated or channelled helmet.)
- Clamp mount: A bracket that slides between the outer shell and the inner EPS foam liner. Requires a small gap (typically 3-5 mm) along the lower edge of the helmet. No adhesive, fully reversible. Works on the majority of full-face and modular helmets from Shoei, Arai, HJC, Bell and similar brands.
- Adhesive mount: A foam-backed plate that bonds directly to the outer shell with 3M adhesive. Used when the shell and liner are bonded together with no gap (common on budget helmets, half-shell helmets, and some injection-moulded shells). Once stuck, removal can leave marks or damage paint.
- Run your finger along the bottom edge of the shell on the left side. If you feel a gap or channel, the clamp mount will work. If the shell meets the liner flush, go adhesive.
Step 2: Attach the Bracket
With the right bracket chosen, mount it to the shell before touching the speakers or microphone. The unit sits on the lower-left side of the helmet, forward enough that controls are reachable while riding but not so far forward that it obstructs your peripheral vision.
- Clamp mount: Slide the metal tab into the gap between shell and liner on the lower-left side. The tab should grip firmly without forcing. Tighten the retention screw (Phillips head, included) until the bracket does not rock. Do not overtighten; you want a firm grip, not a deformed liner.
- Adhesive mount: Clean the shell surface with the included alcohol wipe and let it dry fully (2 minutes). Peel the backing off the 3M pad, position the bracket, and press firmly for 30 seconds. Wait at least 15 minutes before loading the unit onto it; the adhesive needs time to bond.
- Check that the bracket is level: place the unit on it and step back. It should sit parallel to the bottom edge of the shell, not tilted forward or back.
Step 3: Place the Speakers in the Ear Pockets
Speaker placement is the step riders get wrong most often. The goal is centered over the ear canal, flat against the liner, with the speaker face pointing directly inward. A speaker that sits a centimeter too high or too far forward produces noticeably thin sound at highway speed.
- Remove the cheek pad assembly from the side you are working on. Almost all modern helmets use press-stud or slide-fit retention so no tools are needed.
- Locate the speaker pocket in the pad or the helmet liner. It is a circular or oval recess designed for exactly this purpose. If your helmet does not have one, mark the center of where your ear sits with a piece of tape, then create a shallow recess by carefully trimming the foam with scissors.
- Place the speaker in the pocket. It should sit flush. If it protrudes and will press against your ear uncomfortably, add the foam spacers under the speaker to push it slightly outward, and check that the outer pad still closes fully over it.
- Do not cover any helmet ventilation channels with the speaker or its wiring. Check this explicitly before re-seating the pad.
- Repeat for the second speaker on the opposite side.
Step 4: Fit the Microphone
Cardo ships two microphone types and uses different ones for different helmet styles. Using the wrong one produces muffled audio on every call and intercom session.
- Full-face helmets: Use the corded (wired) microphone. It attaches with adhesive to the inside of the chin bar liner, positioned as close to your mouth as the chin bar allows (typically 3-4 cm below your lips when the helmet is on and the chin strap is clipped). Thread the cable up toward the left ear along the liner channel.
- Open-face, half-shell, or modular helmets (with visor raised): Use the boom arm microphone. Clip the boom to the left speaker housing. Bend the flexible arm so the microphone rests approximately 2-3 cm from the corner of your mouth when the helmet is on. The boom should not contact your cheek at any point.
- Test placement before routing: put the helmet on, say a few words at normal volume, and confirm the mic is not rubbing fabric or the visor mechanism.
Step 5: Route and Tuck the Wiring
Loose wiring is the most common cause of rattles and premature connector failure. Take 5 minutes to route cables properly and you will not hear them again.
- Run the speaker cables from each ear pocket toward the left side of the helmet along existing liner channels or grooves. Most liners have a natural cable route built in.
- Both speaker cables and the microphone cable converge at the left side near the unit connector. Cardo units use a single multi-pin connector; seat it firmly until it clicks.
- Use the included cable clips or self-adhesive tie points to anchor any slack against the liner. Cable should have no free loops that can vibrate at speed.
- Re-seat all cheek pad assemblies and check that no cable is pinched between the pad and the shell. Close the chin strap and confirm the buckle operation is not affected by cable routing.
- With the helmet fully assembled, shake it gently and listen for any rattle. A rattle almost always means a loose cable or a speaker not fully seated in its pocket.
Step 6: Clip the Unit On and Pair
The hardware is done. Now the software part, and this step matters for how well mesh networking and music streaming actually behave day to day.
- Slide the Cardo unit onto the bracket until it clicks securely. Give it a firm tug downward to confirm it will not vibrate free at speed.
- Charge the unit fully before first pairing. Cardo recommends a full charge cycle before the first use.
- Open the Cardo Connect app on your phone, enable Bluetooth, and follow the on-screen steps to pair the unit. The app also handles firmware updates, which Cardo pushes regularly; check for one immediately after pairing.
- Configure your audio sources (phone music, intercom, FM) in the app. Set speaker volume at a moderate level and test while stationary before riding.
- If you are pairing with a second rider, both units need to be in pairing mode simultaneously. The app guides you through this for Bluetooth pairing, or tap both units together for Mesh pairing on Packtalk Edge and NEO models.
Clamp Mount vs Adhesive Mount: Which to Use
| Feature | Clamp Mount | Adhesive Mount |
|---|---|---|
| How it attaches | Metal tab slides into gap between shell and EPS liner | 3M foam pad bonds to outer shell surface |
| When to use | Most full-face and modular helmets with a shell-liner gap | Helmets with no gap (budget lids, half-shells, some injection-moulded shells) |
| Reversible? | Yes: slide out, no marks left | No: removal can leave adhesive residue or damage paint |
| Strength | Very secure if gap is the right depth | Secure on clean, flat surfaces; weaker on textured or curved shells |
| Common brands that fit | Shoei, Arai, HJC, Bell, Shark, AGV | Entry-level helmets, Biltwell Gringo, O'Neal, half-shell lids |
| Risk of liner damage | Low if not overtightened | None to liner; risk to shell paint on removal |
DOT vs ECE vs Snell vs MIPS, how to pick the right lid in 60 seconds, and when to replace it. One page, no fluff.
Frequently Asked Questions
Should I use the clamp mount or the adhesive mount on my Cardo?
Try the clamp mount first. Run a finger along the lower edge of the shell on the left side. If you feel a gap between the outer shell and the inner foam liner, the clamp mount fits and is the better choice because it is fully reversible. Use the adhesive mount only if the shell and liner are bonded flush with no gap.
How do I get the Cardo speakers to sound louder?
First confirm the speakers are centered directly over your ear canal, not offset high or forward. Second, add the included foam spacers under each speaker if the pocket is deep; they reduce the air gap between the speaker face and your ear. Both steps together are more effective than simply turning up the volume in the Cardo Connect app. For a bigger jump than repositioning alone, see our guide to the best motorcycle helmet speakers for 45 mm upgrade options.
Can I install a Cardo on an open-face or half-shell helmet?
Yes. Use the adhesive mount bracket (half-shell helmets have no shell-liner gap for the clamp) and the boom arm microphone instead of the corded mic. Bend the boom arm so the mic sits about 2-3 cm from the corner of your mouth. The Packtalk Edge and Spirit both ship with the boom arm in the box.
Do I need to remove the cheek pads to install Cardo speakers?
Yes, and it is easier than it sounds. On nearly all modern helmets the cheek pads detach by pressing tabs or sliding studs with no tools needed. Remove the pad, seat the speaker in the ear pocket, re-attach the pad. The whole process takes about 5 minutes per side once you have done it once.
Which Cardo unit is best for beginner riders?
The Cardo Spirit is the most affordable and simplest to install and operate. It covers single-rider Bluetooth phone calls and music. If you plan to ride with a group that uses Mesh networking, the Packtalk Edge or Packtalk NEO are worth the step up; Mesh is significantly more stable than Bluetooth-only intercom across multiple riders. Riders who also want to capture footage while using an intercom should check our picks for the best helmets for motovlogging, which covers quiet shells and chin-mount camera compatibility alongside Bluetooth. For broader comparisons see our best bluetooth motorcycle helmets guide.
